


What began as a lesson in generosity has become my favorite holiday tradition. While I would love for my children to be intelligent, athletic, and well-liked, my highest priority is for them to be good people. My focus as a mom has been teaching my children to be kind, polite, and respectful, and when they were quite young I realized that the holidays offered an opportunity to teach them about generosity.
At Christmastime, I could easily buy gifts for grandparents and slap tags on the gifts designating my children as the givers, but that does nothing to teach my children about what it means to give. Until my children have the means to be generous with their own financial resources, I teach them to be generous with another resource they have at their disposal—their time. I always tell the kids that time is the most valuable thing you can give someone. When someone gives us their time, we should be appreciative, and at the holidays we can give our time to show our loved ones how much they mean to us.
With these ideas in mind, the children and I undertake a craft project each Christmas. We spend our time making something for the special people in my children’s lives (and an extra for mom to keep!). I typically try to find crafts that heavily involve the children (easier said than done sometimes), are items that people would appreciate having, and will hold up over time (read: no tissue paper ornaments).
As I’ve been at this tradition for almost a decade now, I’ve had some successes and some absolute disasters. In case you’re interested in teaching your children some similar lessons about generosity and giving their time to those they love most, I’m here to take the guesswork out of selecting a craft. Here are some of our favorite projects:
- Kids’ Choice: Suncatchers
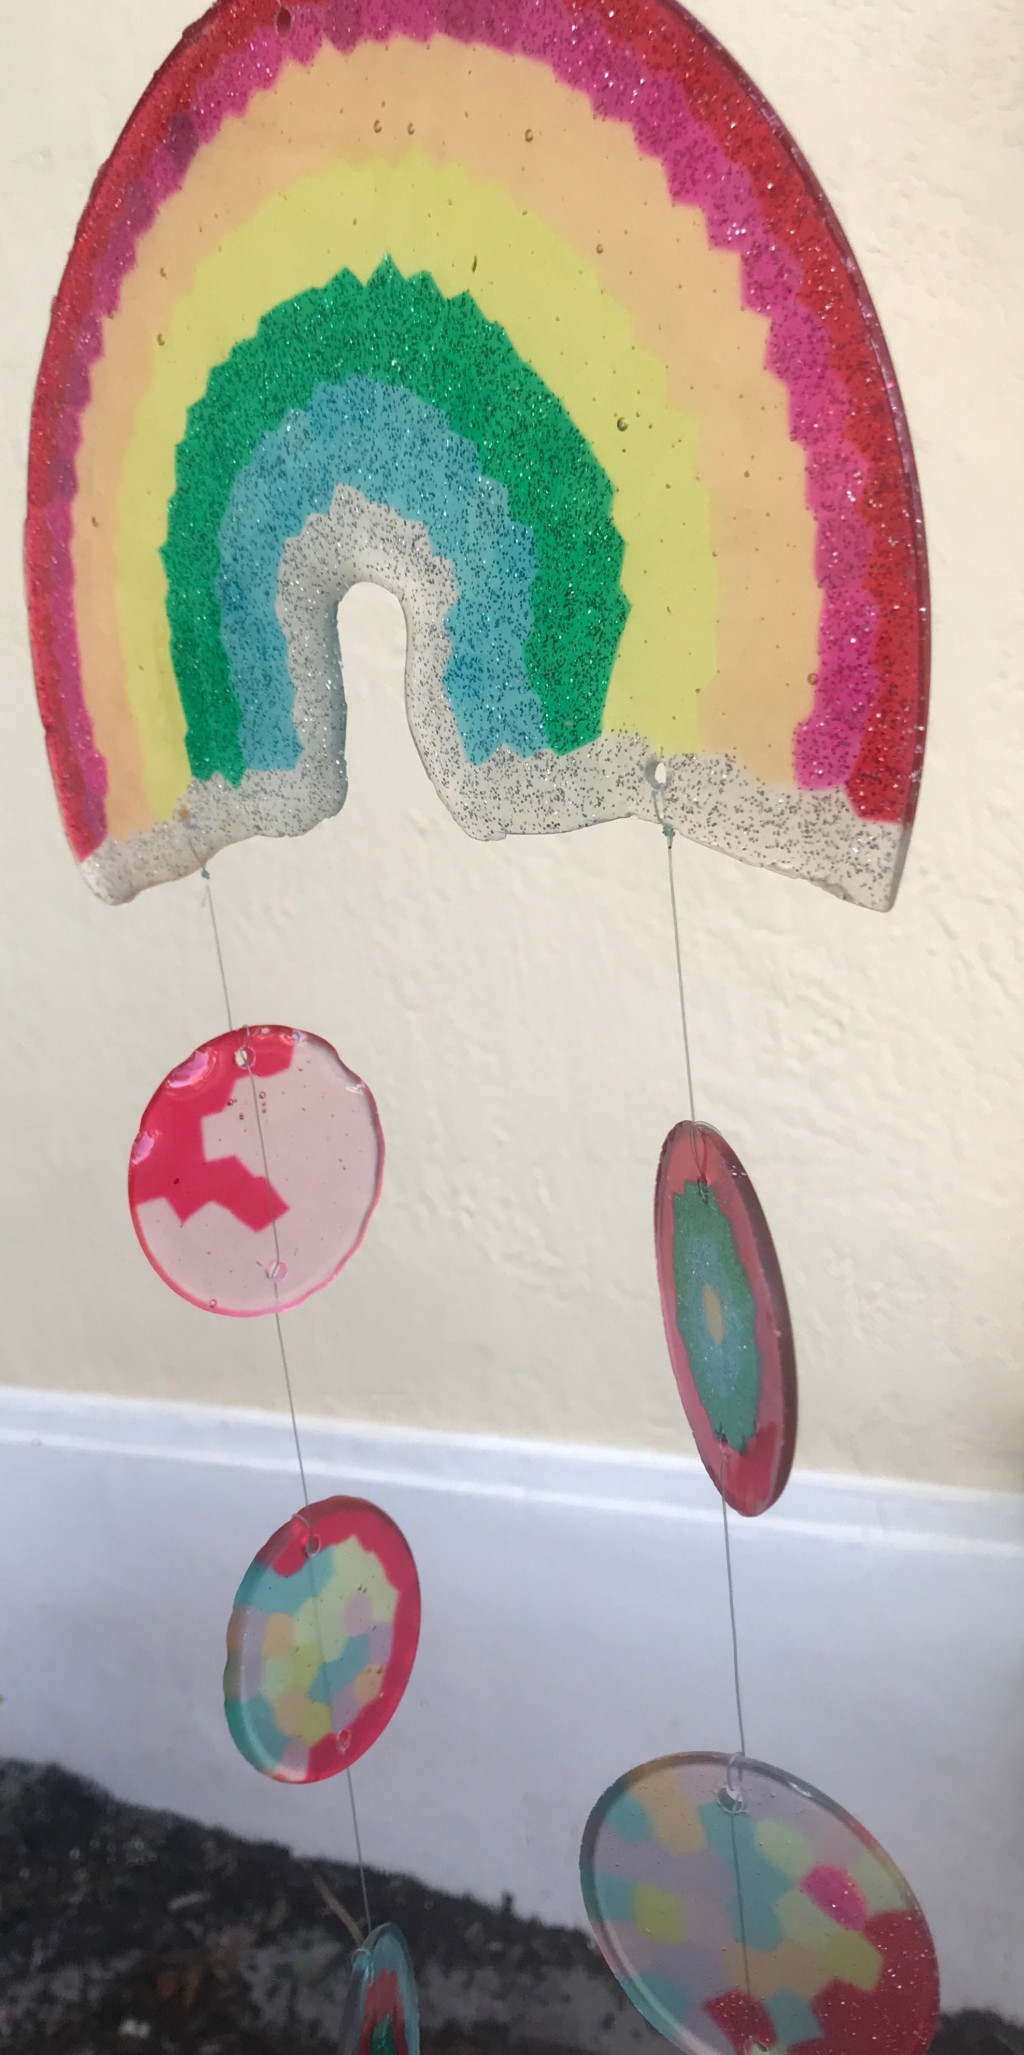 When two of my kids named this as their favorite project, I was a little surprised. My strongest memory is that of my kitchen smelling like melted plastic for days. On the bright side, though, the suncatchers are incredibly durable and can even be used outdoors. These are also really heavy on the kid involvement. My children did all the designs and placing the beads by themselves. You can get step-by-step instructions here: https://artfulparent.com/2012/06/making-melted-bead-suncatchers.html
- Best Project for the Budget Conscious: Handprint Calendars
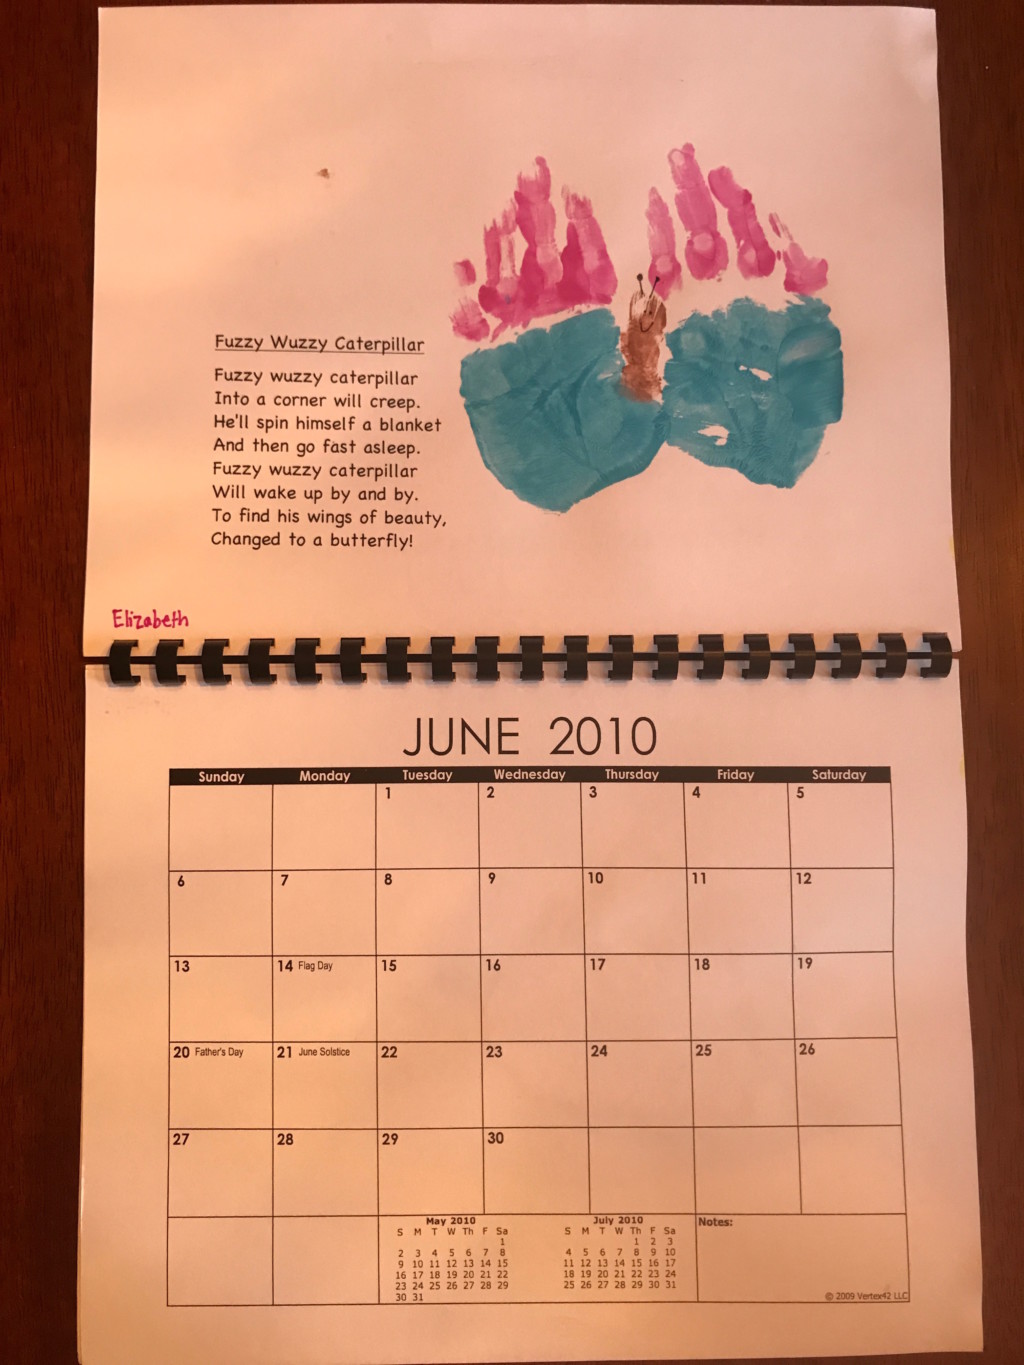 I first used this project when I was an elementary school teacher, and I loved it so much I did it with my own children. This website provides a poem for each month and handprint art that accompanies each month. I printed a blank calendar onto heavy paper and did a handprint for each month. You can either assemble the calendar yourself of take it to an office supply store for spiral binding. My one caveat for this craft is that small children have a hard time holding their hands flat for making handprints. I would say this craft is probably most suitable to children ages four and older. http://littlegiraffes.com/teaching-ideas/257/handprint-calendar/
- Best Throwback Craft: Jar Lid Ornaments
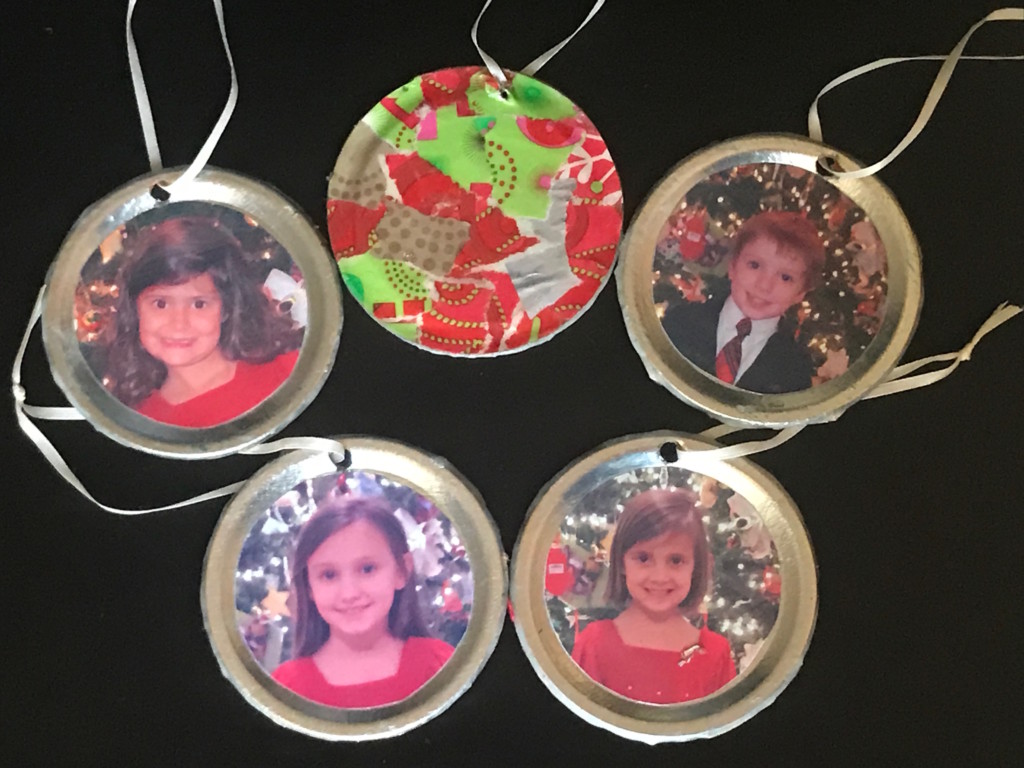 My parents have had an ornament I made on their tree since I was in the second grade, so I know it stands the test of time. I decided to recreate this 1980s schoolroom classic with my own children. It’s so easy that I don’t even have to link to instructions (which is a good thing because there were no craft blogs when someone had this clever idea). The lids that are used for canning jars have two pieces: a lid and a band. For this craft, you only need the lid part (easily found at Wal-Mart, Target, and grocery stores that sell canning supplies ). I printed pictures of my children and cut them to the shape of the lid. We glued the photo to one side. The children made a collage of torn up wrapping paper on the backs of their ornaments. Then we used Mod Podge to seal everything. My husband drilled a hole in the top, and we strung them with pretty ribbon. Instant classic!
- Fanciest Craft Our Family Has Ever Attempted: Photo Coasters
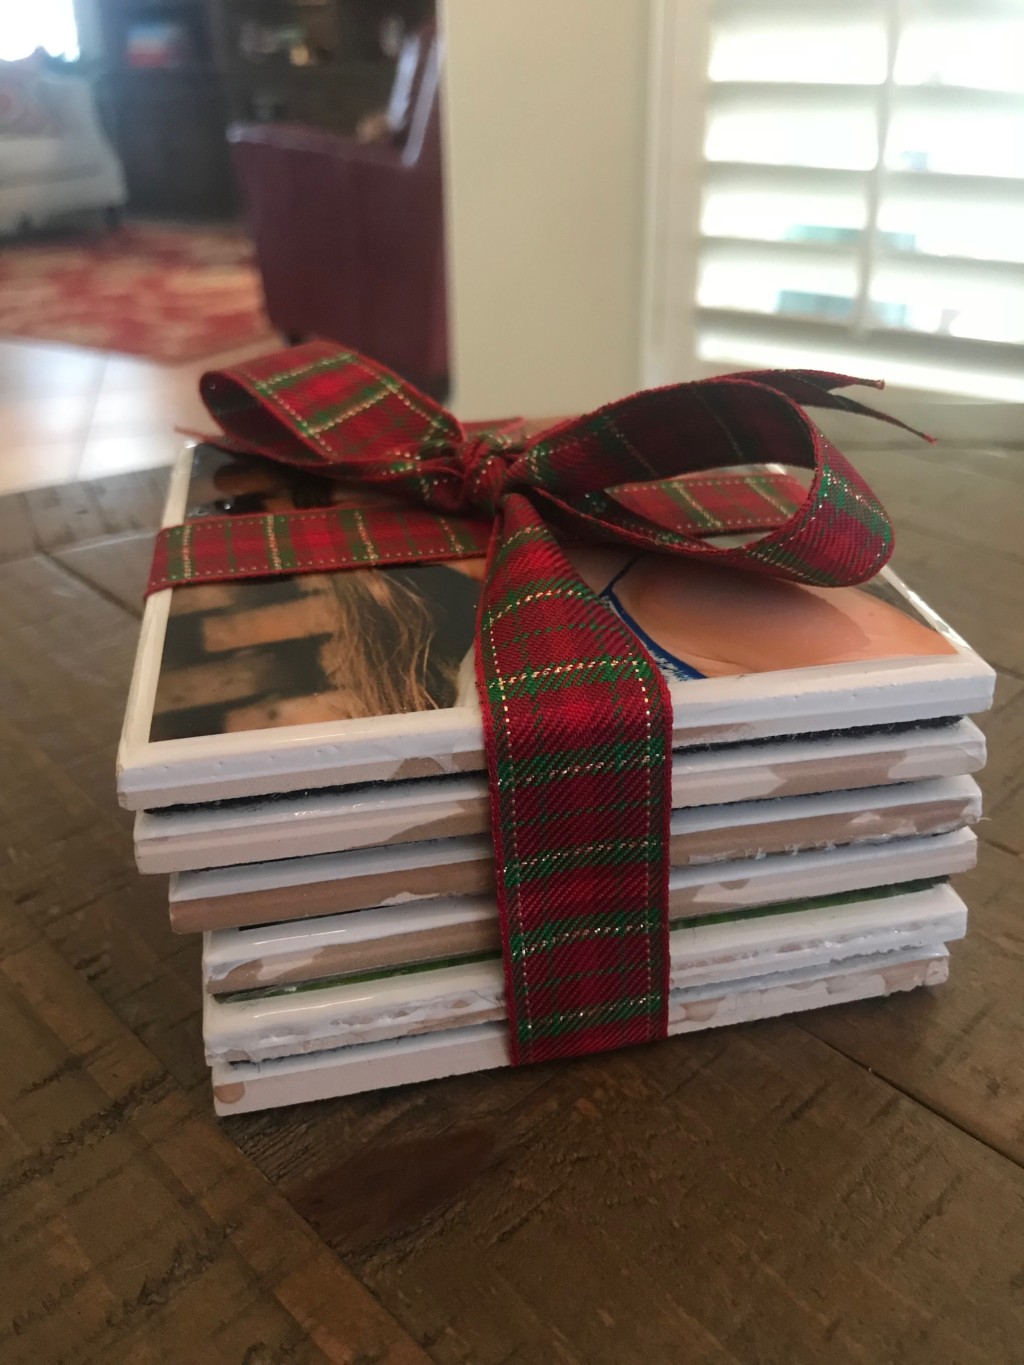
My children are getting older, which means our crafts can be a little more sophisticated. The resin on the coasters has a little bit of a learning curve (helpful hint: work quickly!), but the outcome is quite stunning. This project is definitely the most professional-looking of anything we’ve made together. There are step-by-step directions here: https://clickitupanotch.com/2013/12/photo-coasters/. YouTube has plenty of videos on using the resin if you need some help.
5. Best Overall: Tree Skirt
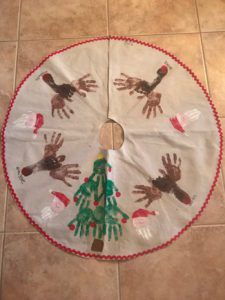 I love the tree skirt that my children made so much that I tell my family it’s the possession I would want to save if our house was on fire. You can search online and find ready-made blank canvas tree skirts, but I opted for a more budget-friendly route. I made canvas tree skirts using these instructions (though I did not do the ruffle): http://sureynotblog.blogspot.com/2011/12/canvas-drop-cloth-tree-skirt.html. If you don’t sew, don’t fear! You can hem your tree skirt with iron on hem tape that is available at any fabric store. Preparing the tree skirt is definitely a job for parents, but the rest is child-focused. Using fabric paint, the children made a hand print Christmas tree, hand print Santas, and foot print reindeer. Our tree skirt is cuter than I ever imagined it would be, and it has become one of my most treasured possessions.
If you want some tips on what not to do, I’d say avoid any craft that involves stringing ball ornaments on a coat hanger (which will never look like a wreath no matter how hard you try), and don’t use permanent paint on your rug without some sort of drop cloth (Ooops! Sorry, sweet and patient hubby!). Other than that, I say jump in and enjoy some quality time with your children while imparting some valuable lessons.


 from the Anxiety Institute")
